Almond Puffs

22 Jun

Ages ago I bought 2kg of ground almond because it was ridiculously cheap. I figured I would practice my macarons and make lovely flour less chocolate cakes and use up the almond as quick as anything. Well I did make some macarons and I did make one flourless chocolate cake but I still had a heap left over. So today I decided to use some up and make some simple almond biscuits. I recently bought ‘delicious.baking’ which is a cookbook full of lovely baking recipes. First recipe in the book was Almond Puffs

20120622-135917.jpg

Ingredients
140g almond meal
115g unsalted butter, softened
2 tbs caster sugar
1/2 tsp vanilla extract (I used 1 tsp homemade vanilla essence)
1 cup plain flour
2 tbs icing sugar
(I also added 1 egg yolk as I found it didn’t come together too easily without it)

Preheat the oven to 180C and line a baking tray with baking paper.

Beat the butter and caster sugar together in a bowl using electric beaters until pale and creamy.

20120622-140352.jpg

Add the almond and vanilla and sift in the flour. Beat until a smooth dough. (This is when I added 1 egg yolk to the mix).

20120622-140507.jpg

Use your hands to roll the dough into balls the size of a walnut. Place on lined tray, 2cm apart, and bake for about 20 minutes, or until golden.

20120622-140709.jpg
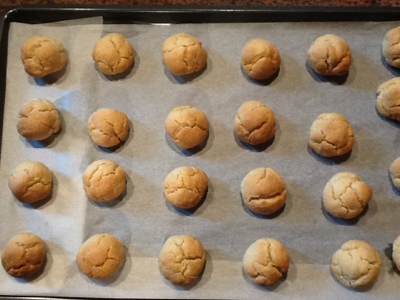
(They look a bit like choux pastry at this point!)

Sift icing sugar evenly over the biscuits and return to the oven for a further 2 minutes. Set aside on the tray to cool completely. Store for 2-3 days in an airtight container.

20120622-140849.jpg

This recipe is super easy to follow. If your mixture comes together well without the egg yolk, don’t feel the need to add it. This biscuits would go well with a cup of coffee as my mum enjoyed them or amongst a plate of mixed biscuits for afternoon tea.

Hope everyone has a great weekend!

Mum’s birthday cake

21 Jun

Last Monday it was my mother’s birthday and as practice for my cake making I made and decorated a cake for her. Now this was to be the first cake I had done since Planet Cake and I was nervous as I wanted to remember everything I had learnt and apply it to this cake.

I decided to make a moist chocolate and raspberry mud cake as my mum loves chocolate. I baked the raspberries into the cake which I torted into three layers and filled and covered with dark chocolate ganache. I managed to get perfect straight edges with the ganache so that was one step done! Mum said she would like a yellow cake and I could decorate it however I liked. After covering the cake board with white rtr, I covered the cake in thinly rolled yellow rtr. Using the techniques learnt at Planet Cake I achieved a lovely straight edged cake. I kept the decorations simple, making some sugar flowers and piping ‘Happy Birthday Mum’ on top.

20120621-223220.jpg

I think I should have piped the enscription in another colour but all in all I’m pretty happy with how it turned out.

Planet Cake

20 Jun

About a month ago I went to Sydney to do a Planet Cake course that I had been gifted by my lovely bf for Christmas. I decided to just do 101 which is the first course so I could learn the tricks that make the difference between a pretty cake and a stunning cake. The main thing I wanted to know was how to get those awesome sharp corners!

In the course we were given a pre-made cake which we had to cut into three layers, layer and cover with ganache, cover with RTR (ready to roll icing or fondant as they say in America), and then decorate. Easy right?
I’m glad I knew some of the basics already as it made for a fun and relaxing day. Our teacher Luigi was really good, helping us out whenever we needed it and making jokes along the way. We met Paris Cutler-owner of Planet Cake- and she answered all the questions we had about cake and the business as we ate a delicious provided lunch.

20120620-155855.jpg
Me decorating my cake at Planet Cake

We got to decide on whatever colour we wanted to make the cake which made for an interesting display at the end of the course (I stuck with pink and red 🙂 ).

20120620-160051.jpg
That’s me at the back in the middle, and my cake in the front/middle.

I’m really happy with how my cake turned out and that I had learned some of the tricks of the trade! Although it is in Sydney, I definitely recommend it to anyone that wants to learn how to make and decorate an awesome cake. There were complete newbies there and people with some more experience, and everyone managed to produce a spectacular cake. At the end of the course the cake was boxed up and I took it as my carry-on luggage for my flight back home. No questions were asked and it arrived in one piece! Yippee!

20120620-160548.jpg
My masterpiece!

20120620-160632.jpg
Outside of Planet Cake

And we’re off!

19 Jun

Alright, I finally bit the bullet and have started a food blog.

Hi there, for those who don’t know me, my name is Madeleine (aka thepinkshoe) and I LOVE food. I can’t remember a time when I didn’t love some type of food. Don’t get me wrong, there’s some food that I don’t enjoy at all but there’s some amazing food that really excites me. Since I was little it has been everything sweet. I’m pretty sure there’s pictures of me and my sisters being the only ones at the food table at a party eating as much sugary goodness as we could.

I studied Food Technology and Hospitality in VCE and am currently deferred from my Patisserie studies. At the moment I am really into making and decorating cakes so expect to see some on here!

So about the blog. I plan on using this as a way to share what I enjoy to cook and to eat. Hopefully I’ll be motivated to try out some new recipes and get to all the cookbooks I have!

Feel free to writefollow and/or write to me. Or even suggest some things for me to cook!

20120620-022416.jpg